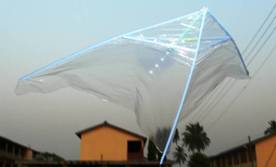
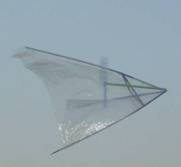
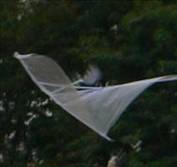
Rubber Band Propelled Straw Kite
|
|||
|
|
|||
|
|||
|
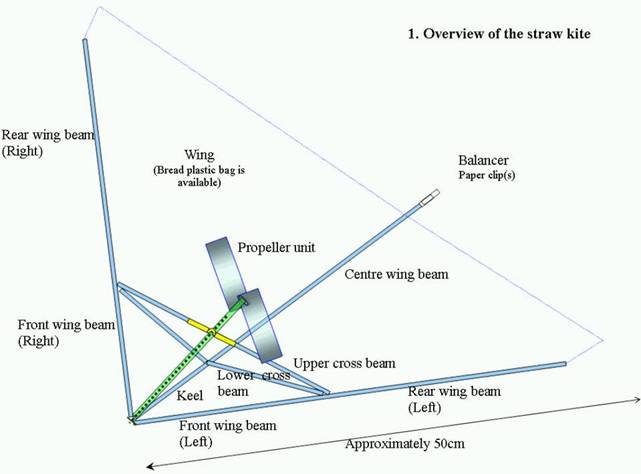
2. How to assemble kite body frame |
|||
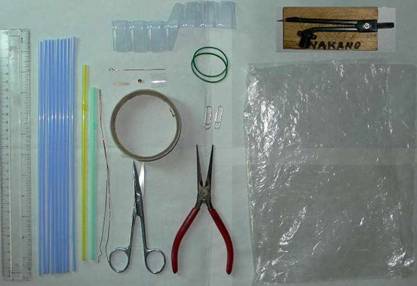
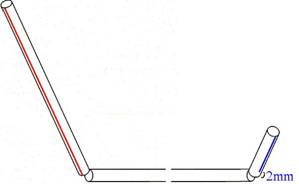
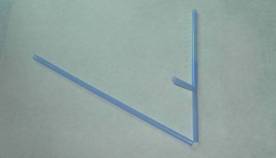
| Using 4mm diameter and 4.5mm diameter straw(s)
make following parts. |
 |
|
|
||||||
|
||||||
|
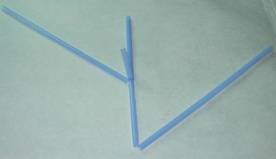
Fig. 4 |
5.
Insert 70mm arm of a front wing beam 1 into
keel straw’s long arm (figure 4 & 5). 6. Insert another front wing beam’s 70mm arm into keel straw’s long arm (figure 6). |
|
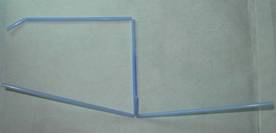
Fig. 5 |
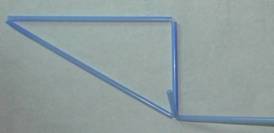
Fig. 6 |
|
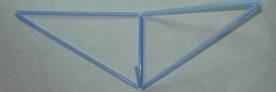
Fig. 7 |
Fig. 8 |
|
7. Insert 70mm arm of lower cross beam 1 into keel straw using different end (figure 7).
|
8. Insert 25mm arm of the lower cross beam 1 into near front wing beam free end (figure 8).
|
|
Fig. 9 |
Fig. 10 |
|
9. Connect lower cross beam 2 like figure 9.
|
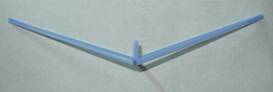
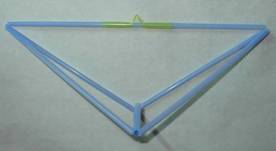
10. Figure 10 shows front view of the kite.
|

|
Fig. 11 |
Fig. 12 |
Fig. 13 |
|
11. Cut off a square piece of plastic from middle part of propeller unit holder (figure 11 & 12). |
|
12. Insert upper cross beam into the propeller unit holder (figure 13). |

|
Fig. 14 |
|
13. Slide the propeller unit holder to centre of the upper cross beam. Then push the holder from both side to make a tubular hole. |

|
Fig. 15 |
Fig. 16 |
|
14. Insert each 25mm arm of upper cross beam to free end of lower cross beam respectively (figure 15 & 16). |
|
|
Fig. 17 |
15.
Collect and make three approximately 6.5cm
straws and three approximately 7cm straws from remaining 5mm diameter straw
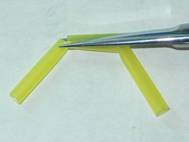
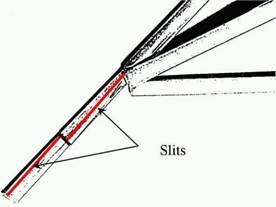
pieces. 16.
Make longitudinal slits on the straws (figure
17). 17.
Insert three 6.5cm slit straw into front wing
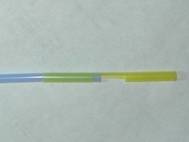
beams’ and keel’s rear ends about 3.5cm deep respectively. 18. Insert three 7cm slit straw into the 6.5cm slit straws about 5cm deep respectively (figure 18, 19 & 20). |
|
|
|
|
Fig. 18 |
Fig. 19 |
|
|
|
|
Fig. 20 |
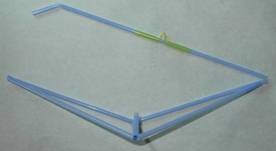
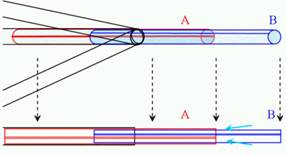
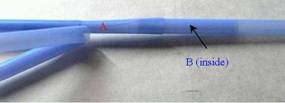
19. Insert rear wing beams and centre wing beam into the space between straw A (6.5cm slit straw) and straw B (7cm slit straw) on figure 21. Squeeze beam straws up to the end firmly (figure 22 & 23). |
|
Fig.21 |
|
|
Fig. 22 |
Fig. 23 |


|
3. Propeller unit assembly |
|
|
|
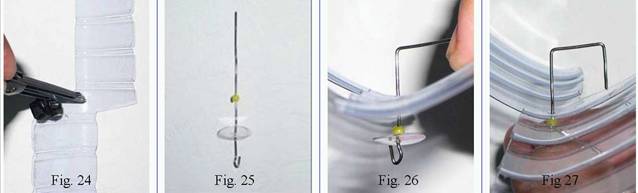
1. Make a hole with compass needle in the middle of the propeller (figure 24). 2. Insert hook like clip wire into the plastic disc and the bead (figure 25). 3. Bend the wire like the picture above (figure 26 & 27). |
|
|
|
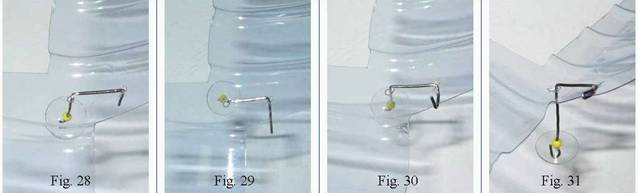
4. Make a hole on the propeller and insert the free end of the wire (figure 28). 5. Bend the free end of the wire like the pictures and fix the wire on the propeller (figure 29, 30 & 31). |
|
|
|
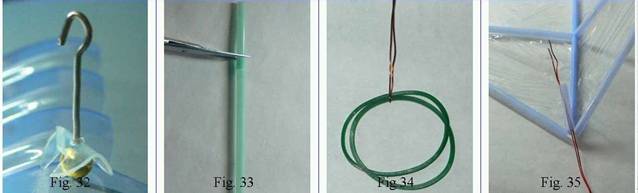
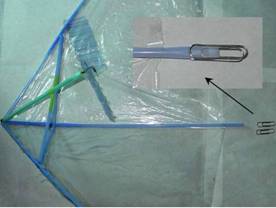
6. Bend the plastic disc and make two slit like figure 32, then fold up the part between slits. 7. Cut above flexible part of 6mm diameter flexible straw and make a 17.5cm piece. 8. Make to shallow V shape cut on the flexible edge of the straw in order to catch the plastic disc (check figure 39). 9. Hook two rubber bands with a metal wire then put the wire through straw attached to the keel (figure 34 & 35). |
|
|
|
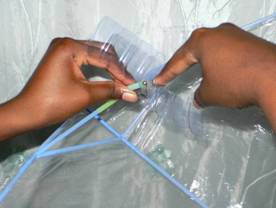
10. Put 17.5cm piece into propeller unit holder, then put the wire into the 17.5cm piece (figure 36). 11. Use a 1.5cm bamboo stick to fix the end of rubber bands (figure 37). 12. Pull the rubber band out of 17.5cm straw, then remove the wire and hook the propeller to the rubber bands (figure 38 & 39) |

|
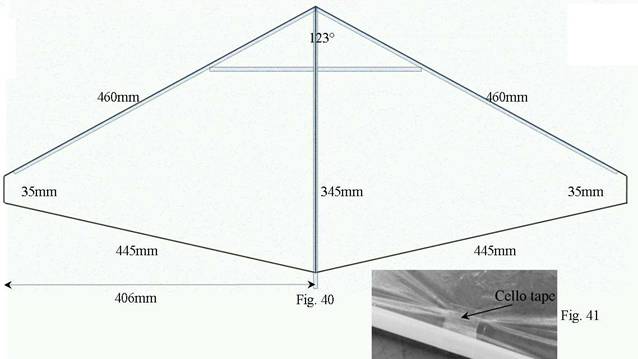
4. How to paste wing Cut out thin plastic sheet of a plastic bag or of plastic bags. The size is shown below. Fix the plastic sheet on wing beams with cello tape or other proper adhesive. |
|
|
|
5. Balance the kite |
|
|
Fig. 42
|
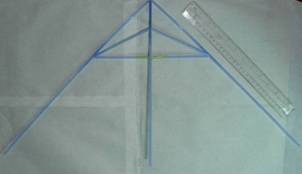
1. Insert one or two paper clip(s) into the tail end of centre wing beam (figure 42). 2. In a large room like a gym or an assembly hall or in the school ground where it is windless, hold and support the kite gently with keel or forepart of centre wing beam. 3. Push the kite forward (slightly downward) into the air slowly and check the flight. 4. Adjust the numbers of clip (balancer) and balancer’s position until the kite reaches the farthest. |
|
6. How to fly the kite |
|
|
|
1. Hold the upper part of propeller unit straw with your left hand then using with your right hand index finger wind up the propeller at least sixty times. How many times you can wind up depends on the strength and quality of the rubber bands. 2. Hold the propeller with your left hand and hold the centre wing beam with your right hand. Push and release the kite slightly upward into the air. 3. Let us check the best flight condition. |
|
7. Warning! Do not play with the kite near the road or railway. Do not play with the kite near the electric cable nor expensive illumination lamps. |
|
“Rubber band propelled straw kite” copyright JICA Senior Volunteer Hideo Nakano (January 2008)
